> For the complete documentation index, see [llms.txt](https://help.simnetonline.com/instructor-experience/llms.txt). Markdown versions of documentation pages are available by appending `.md` to page URLs; this page is available as [Markdown](https://help.simnetonline.com/instructor-experience/admin-settings/admin-settings-general.md).
# Admin Settings - General
Learn how to review account details, manage assigned products and options, and view account offers in SIMnet Admin Settings.
Play VideoRight click to open the video in a new tab.
{% hint style="success" %}
Admin Settings are an important part of managing an account in SIMnet. SIMnet administrators have access to all courses, users, content, and reports across their entire school or URL. Only administrators have access to account level settings in SIMnet.
{% endhint %}
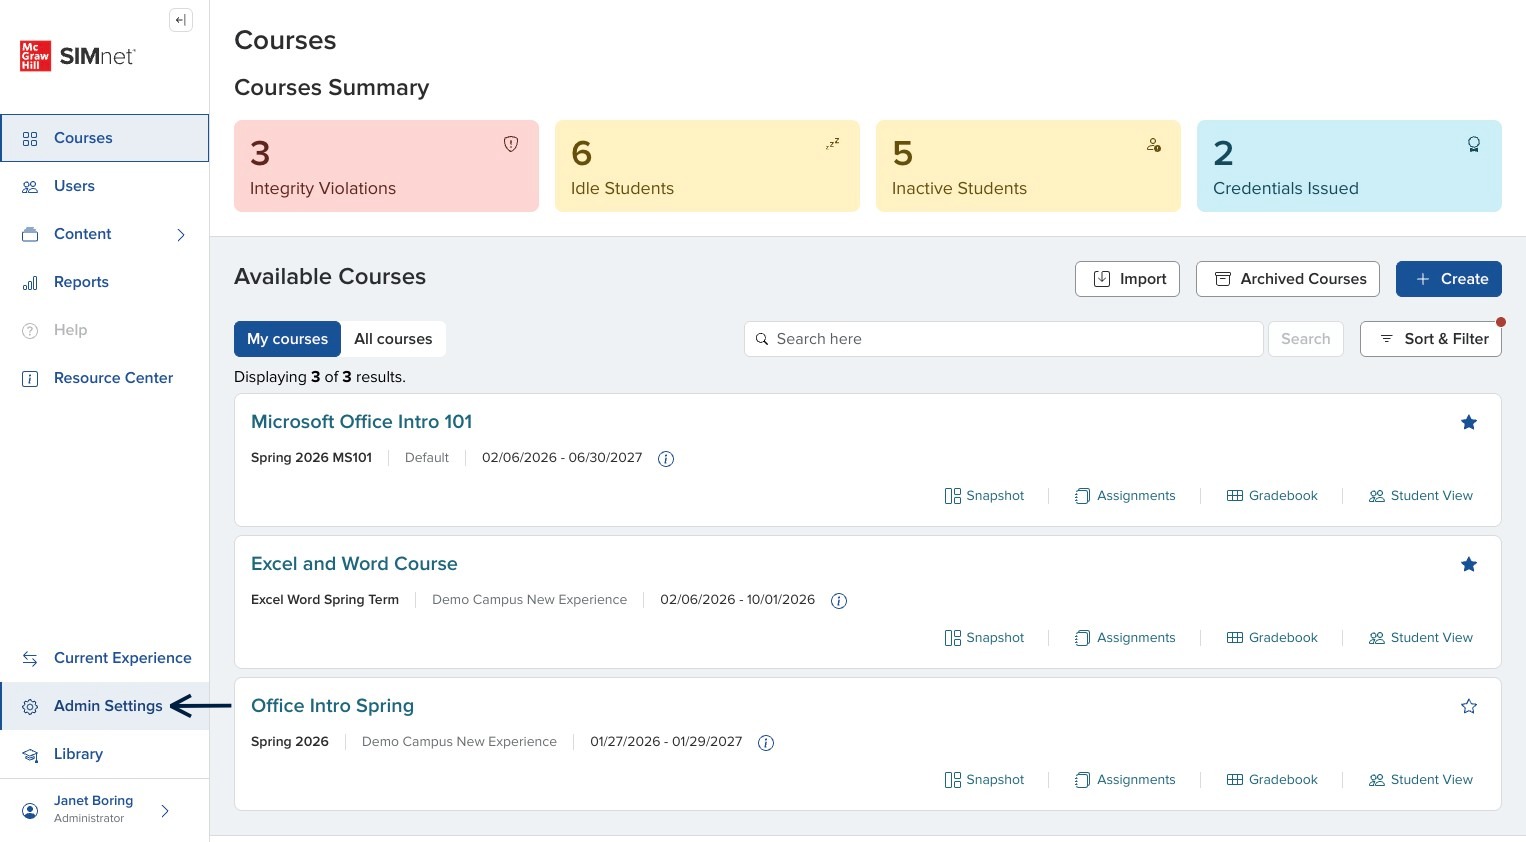
If you are the admin for your school's account or URL, you will have access to Admin Settings in the lower-left side of your navigation.
### View Details
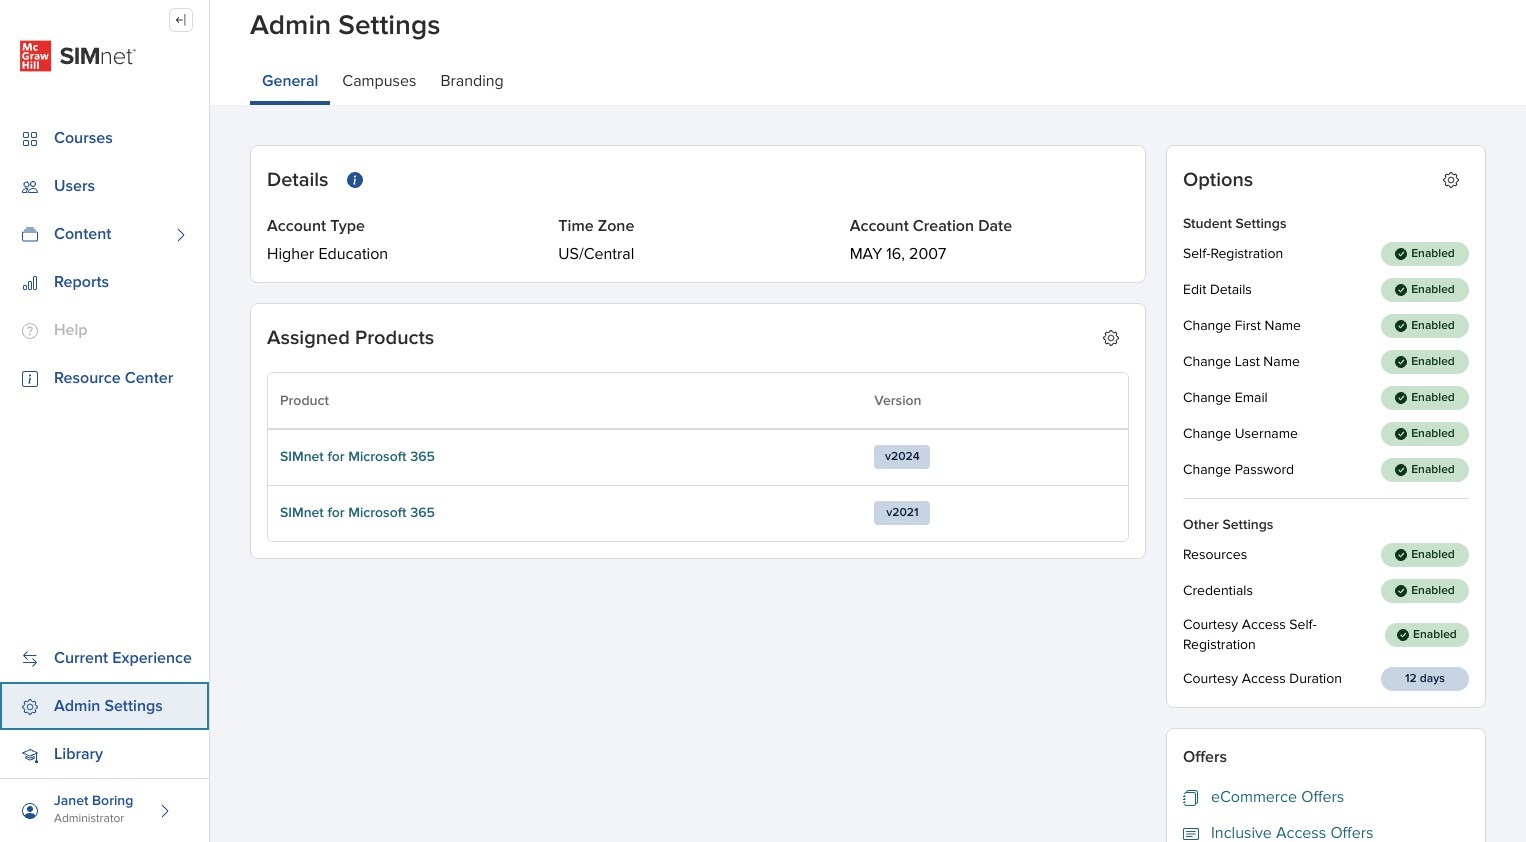
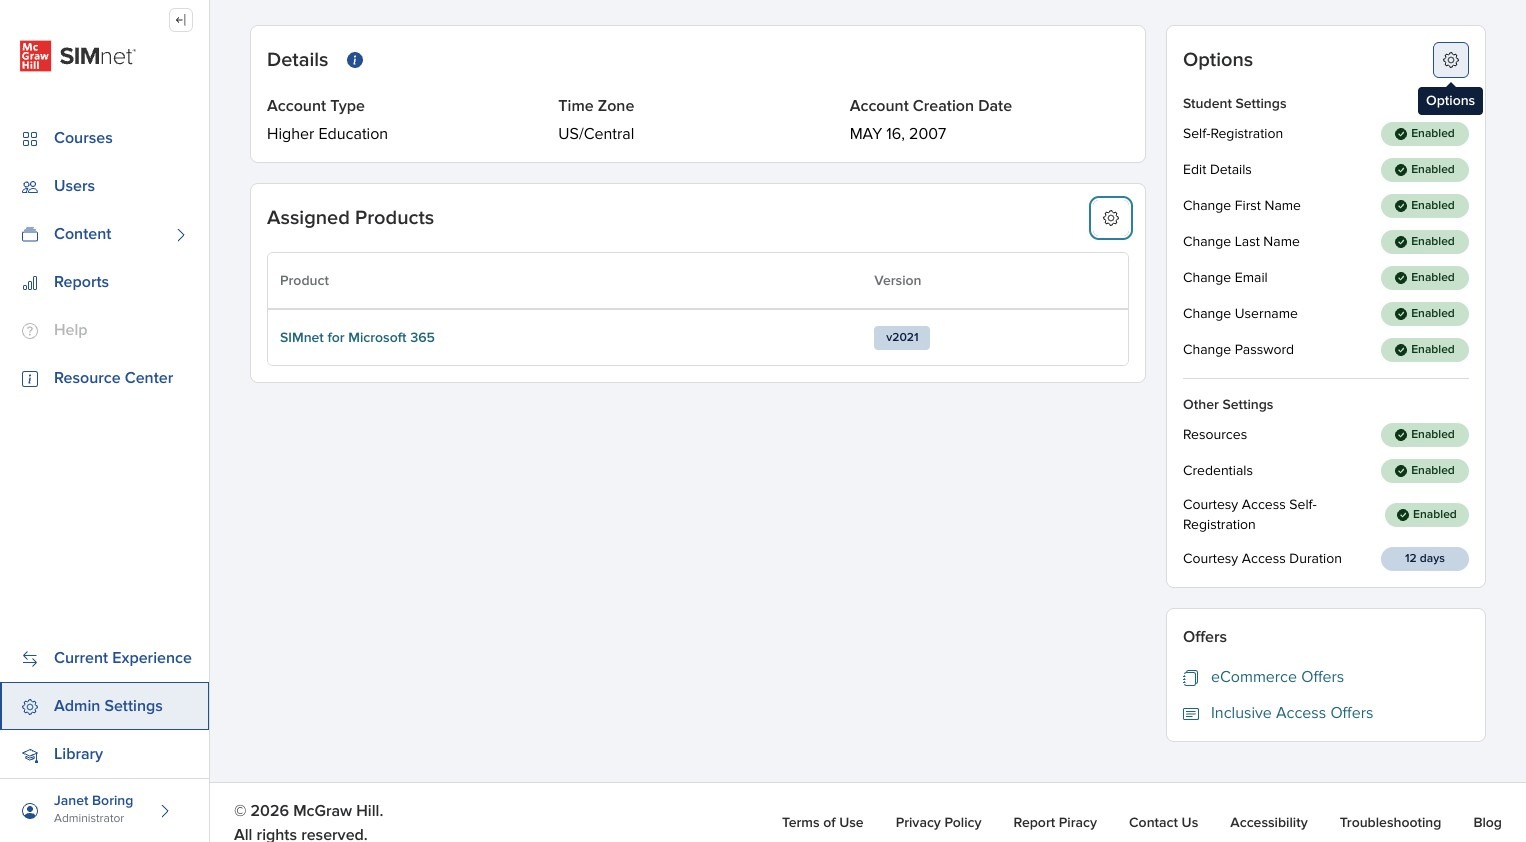
Clicking on Admin Settings takes you to the General tab. Here you can see the account details, view and manage assigned products, account options, as well as account offers.
If your Time Zone is incorrect, please contact your McGraw-Hill representative to change it.
{% hint style="info" %}
**Learn more:** [Campuses](/instructor-experience/admin-settings/admin-settings-campuses.md), [Branding](/instructor-experience/admin-settings/admin-settings-branding.md) for details related to those tabs.
{% endhint %}
### Manage Assigned Products
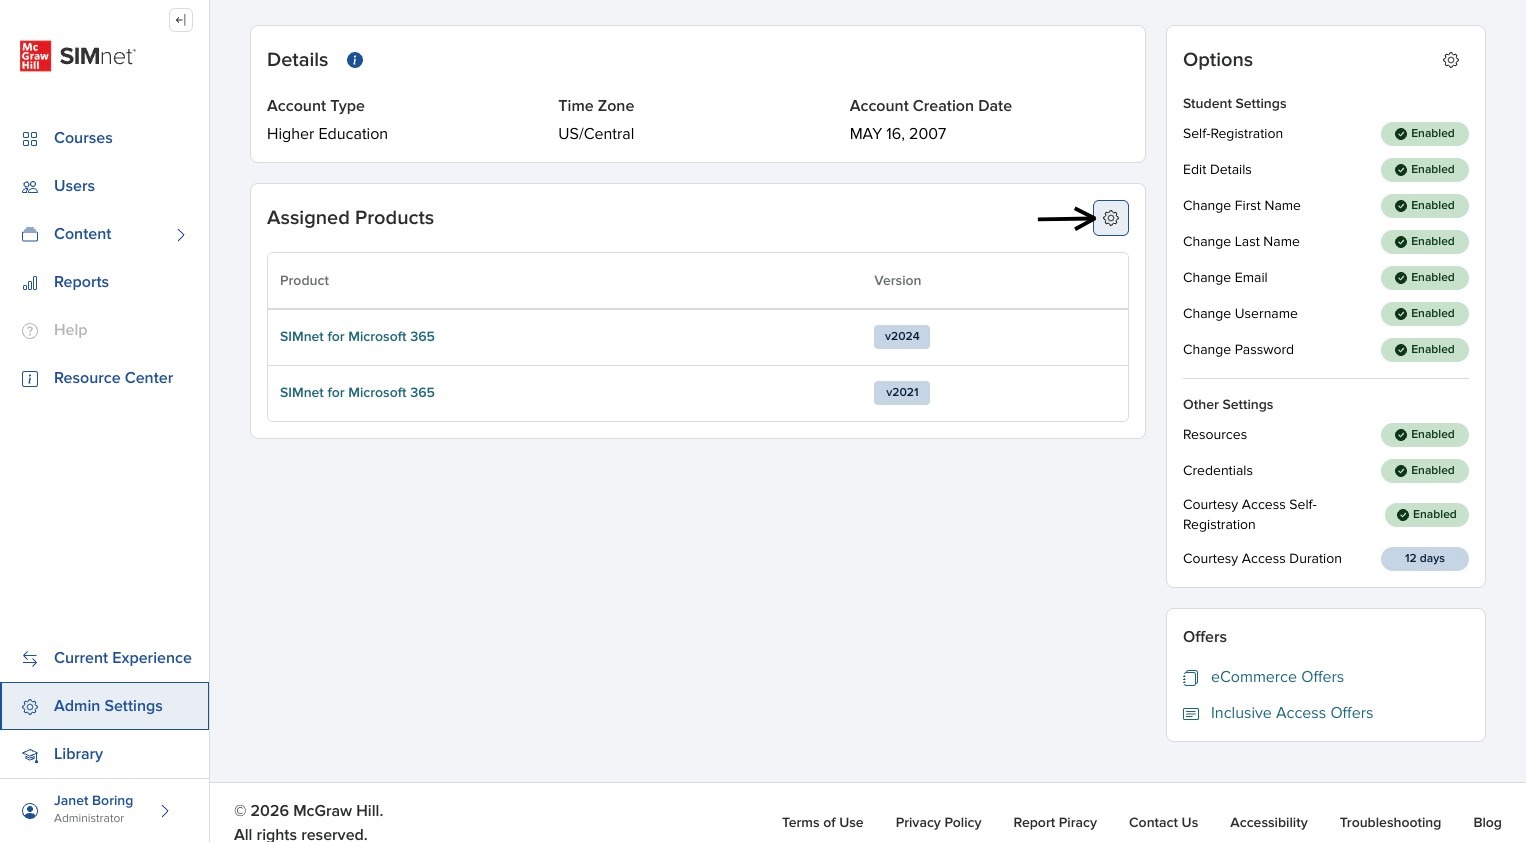
To manage Assigned Products click the gear icon.
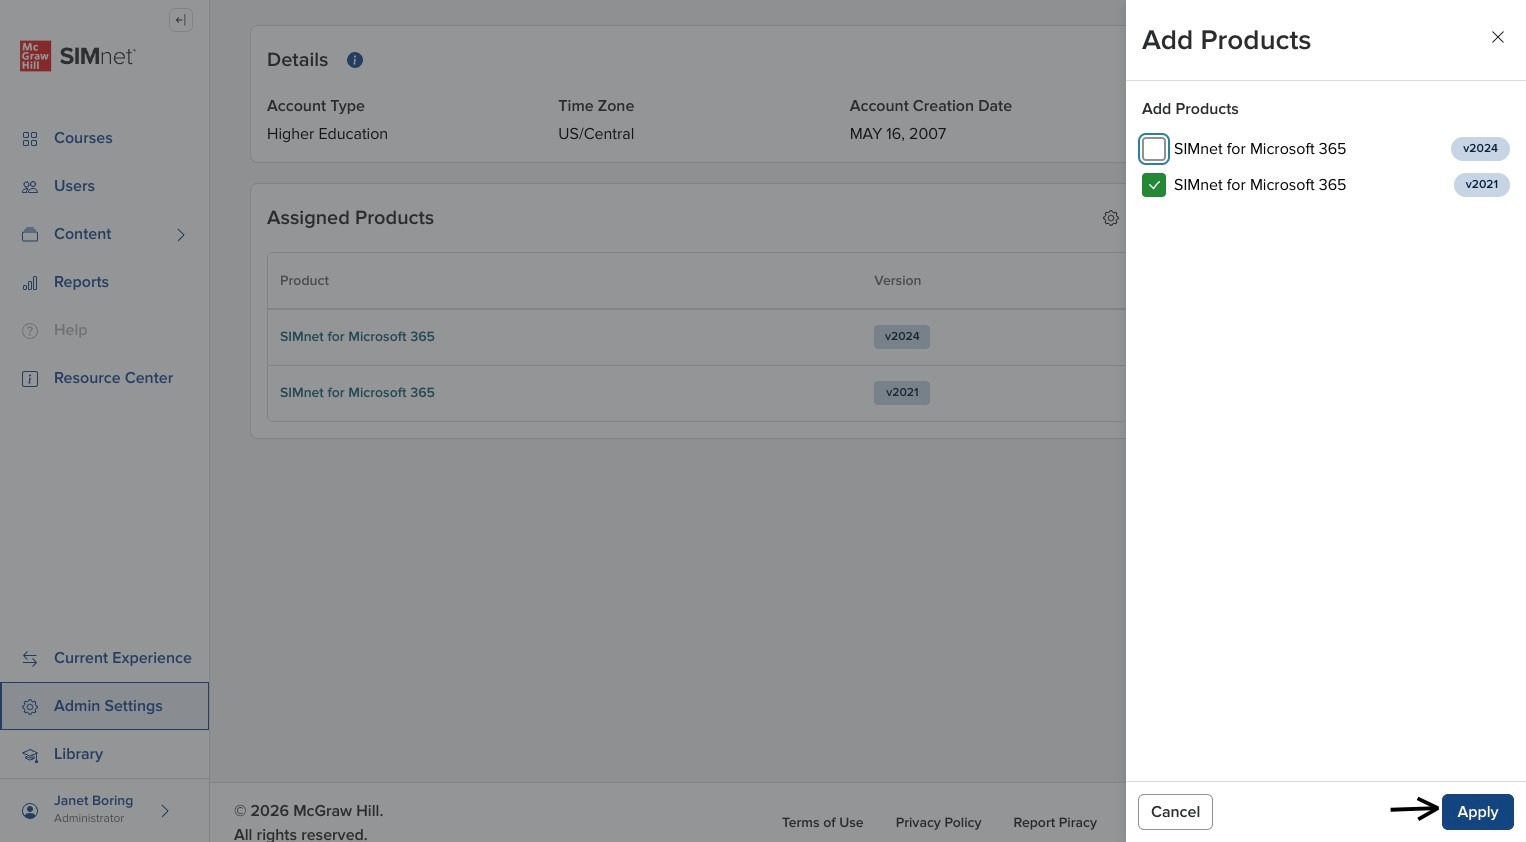
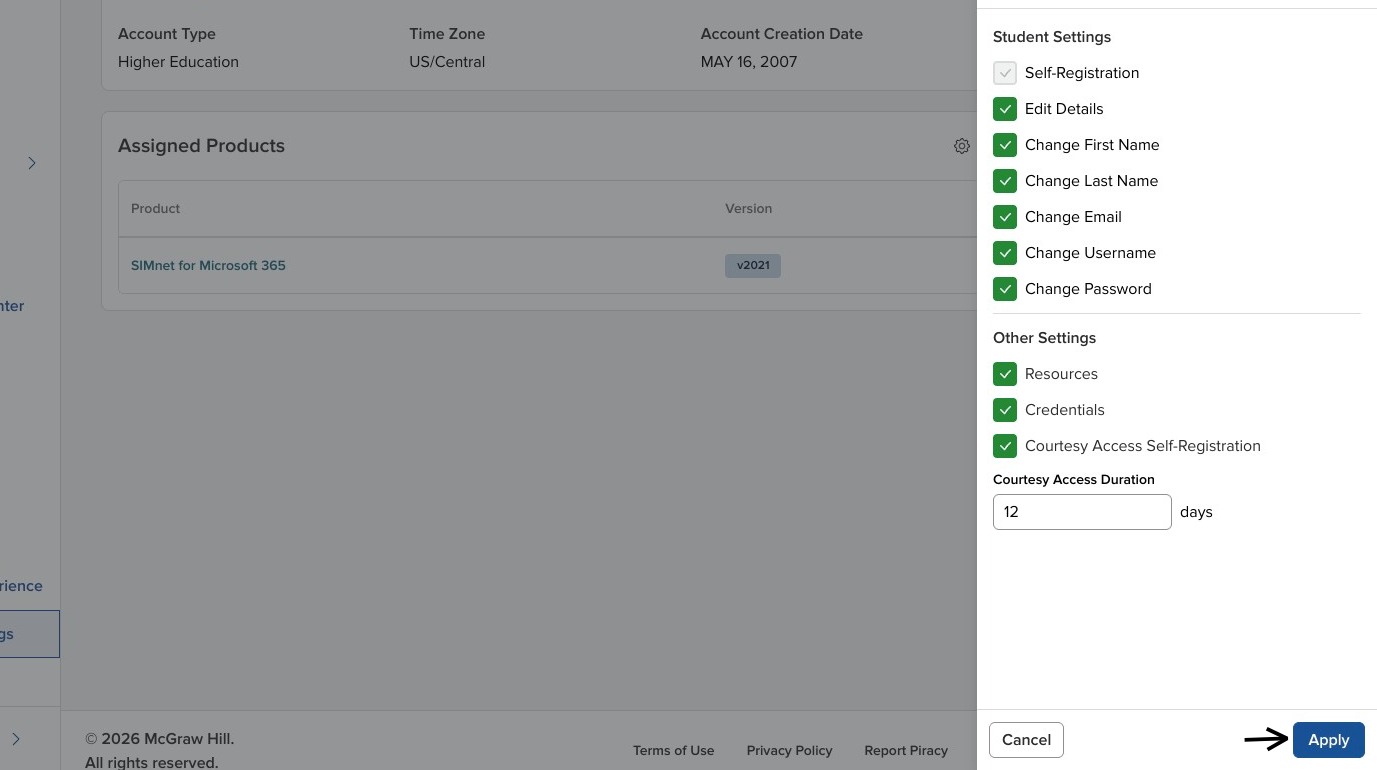
This opens a right-side panel showing the available Products for your account. Select or deselect products as needed and click Apply in the lower-right corner of the panel.
### Manage Options
To manage Options, click on the gear.
This opens a right-side panel showing settings that can be changed.
#### Student Settings
When Allow Student Self-Registration is enabled, this option allows students to create their own SIMnet accounts from the login page. This may be disabled by default depending on your account setup.
Enabling Allow Students to Edit Details lets students modify their name, email, username, and password. You can then choose which of those you allow students to modify. If you are using an LMS, it's not recommended to allow these changes.
If you make any updates click Apply in the lower-right of the panel.
#### Other Settings
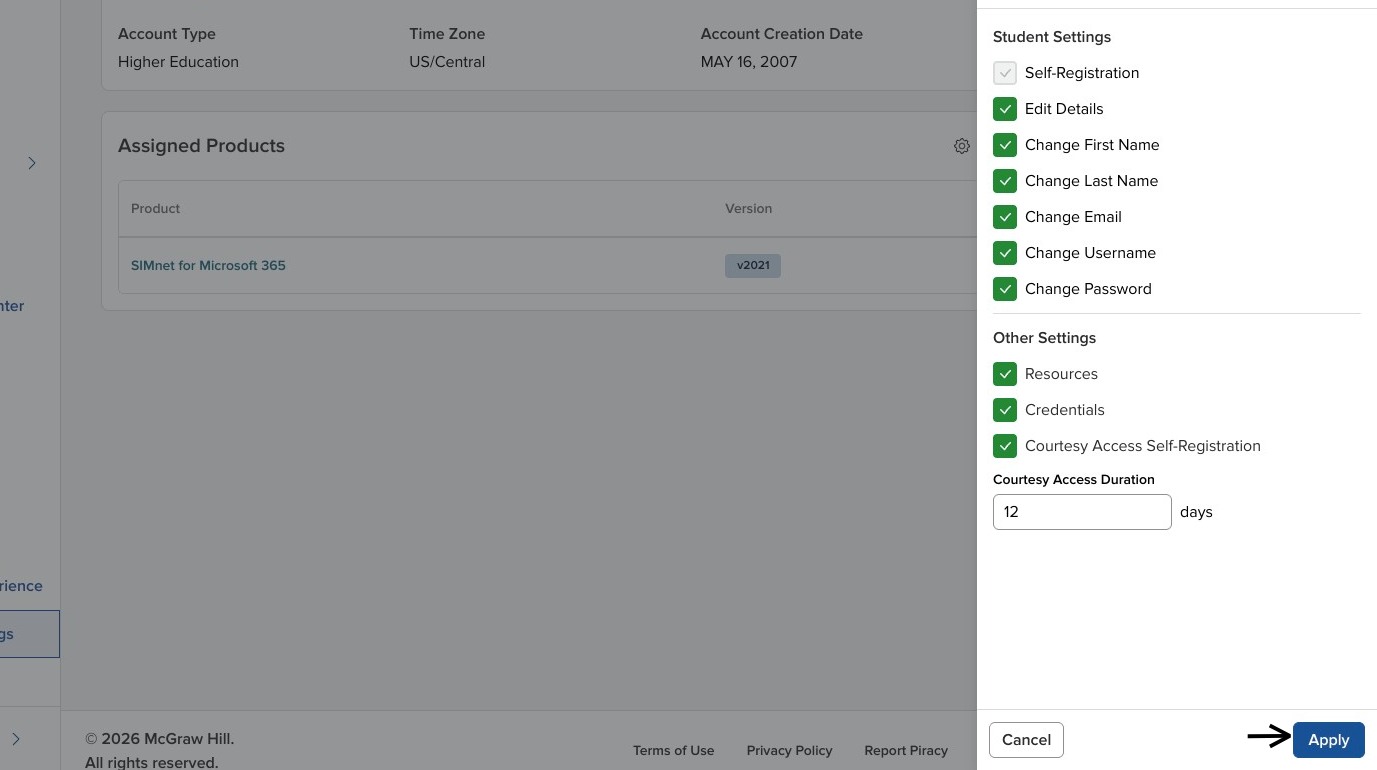
These are enabled by default and there is usually no reason to change them, other than Courtesy Access Duration.
* Resources enables the use of the Resources content type.
* Credentials enables the issuance of digital credentials for students.
* Courtesy Access Self-Registration allows students to activate Courtesy Access.
* Courtesy Access Duration can be customized from 1-14 days from date of activation.
If you make any updates click Apply in the lower-right of the panel.
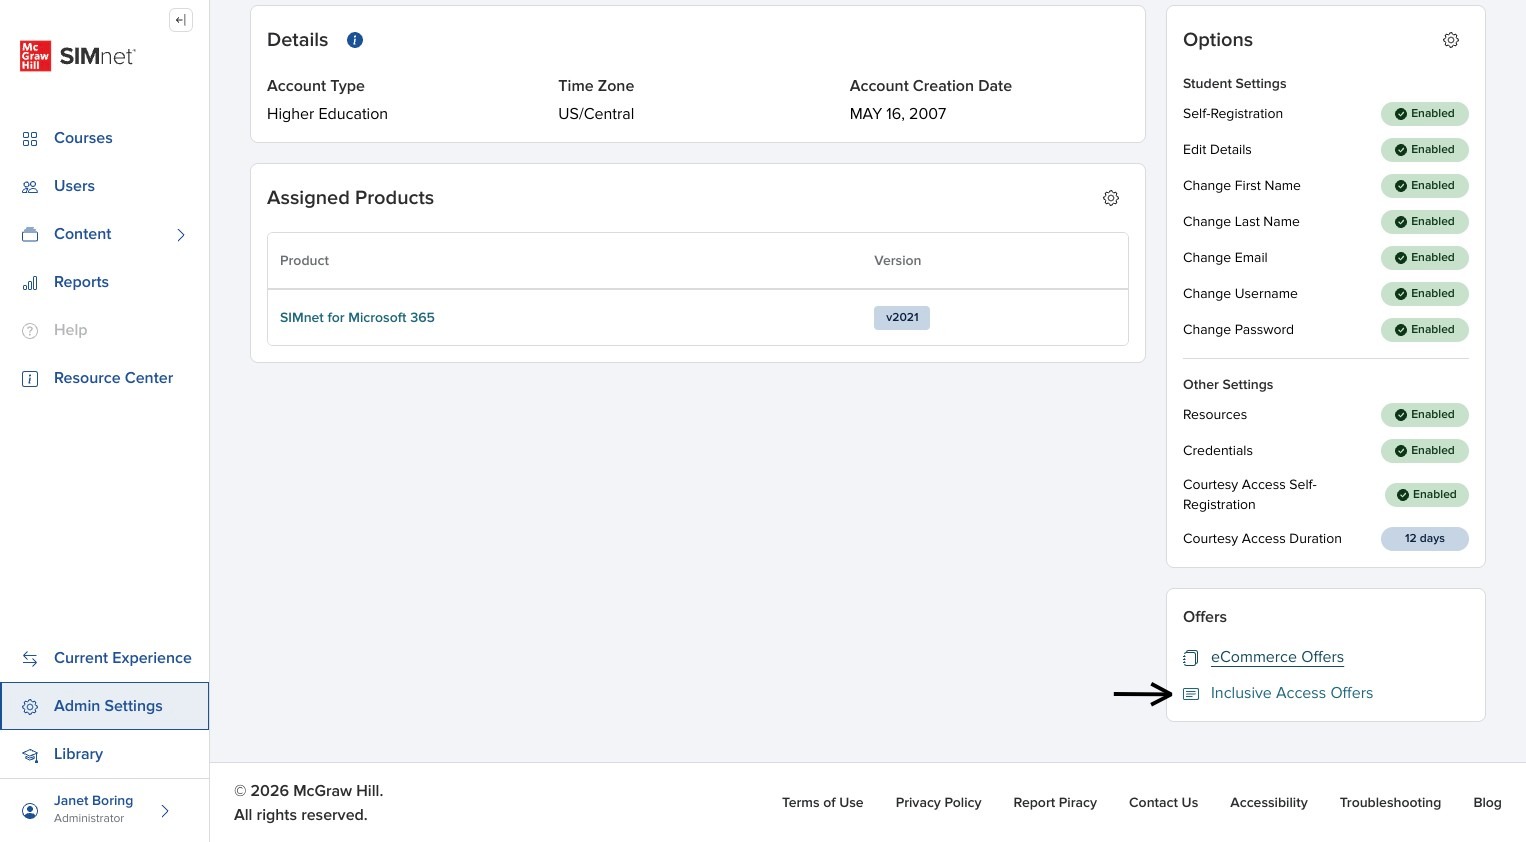
### View Account Offers
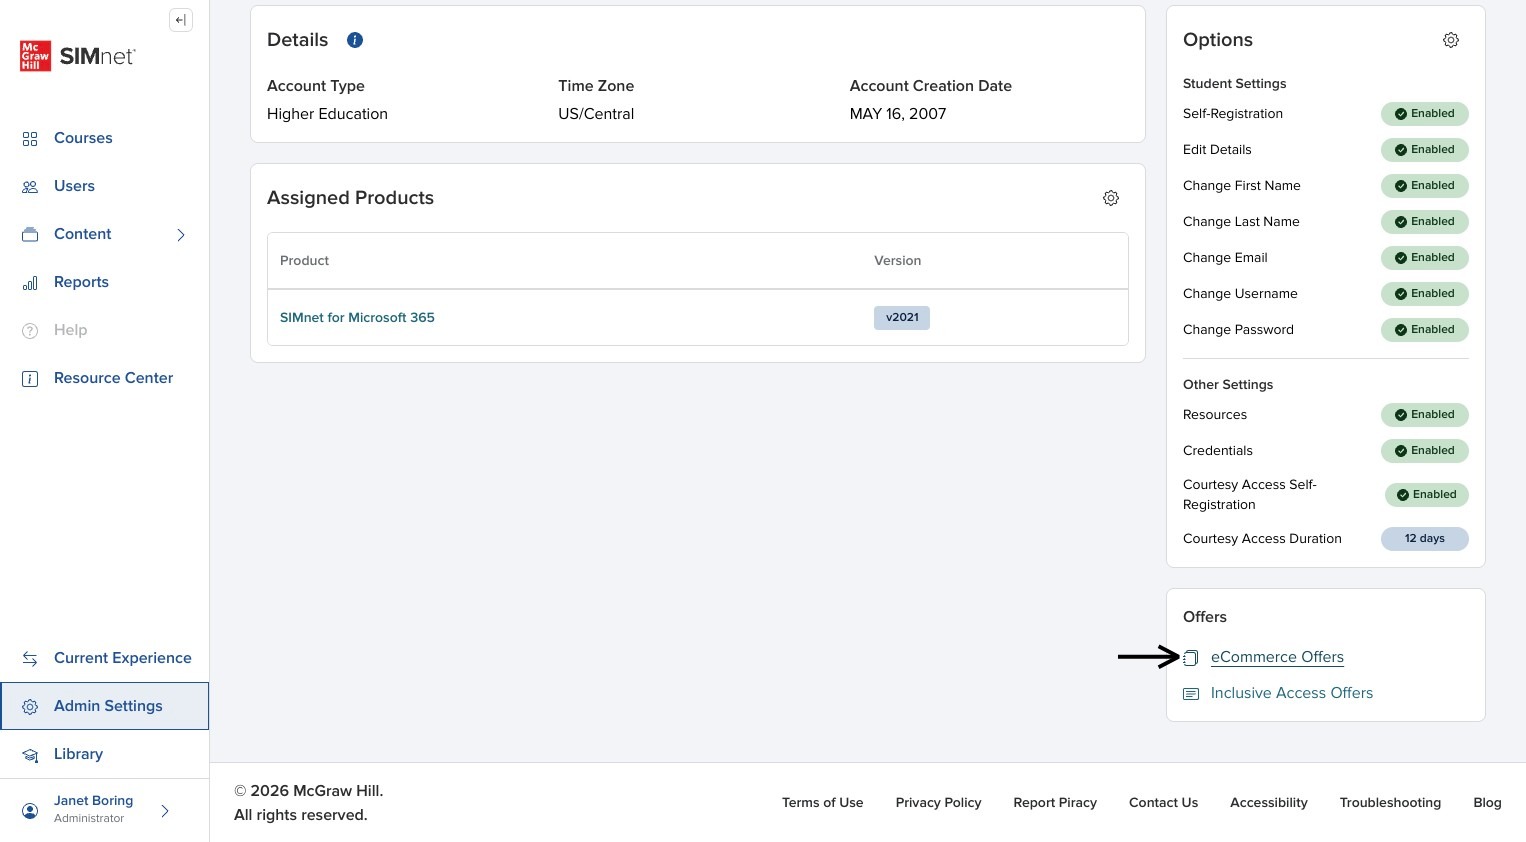
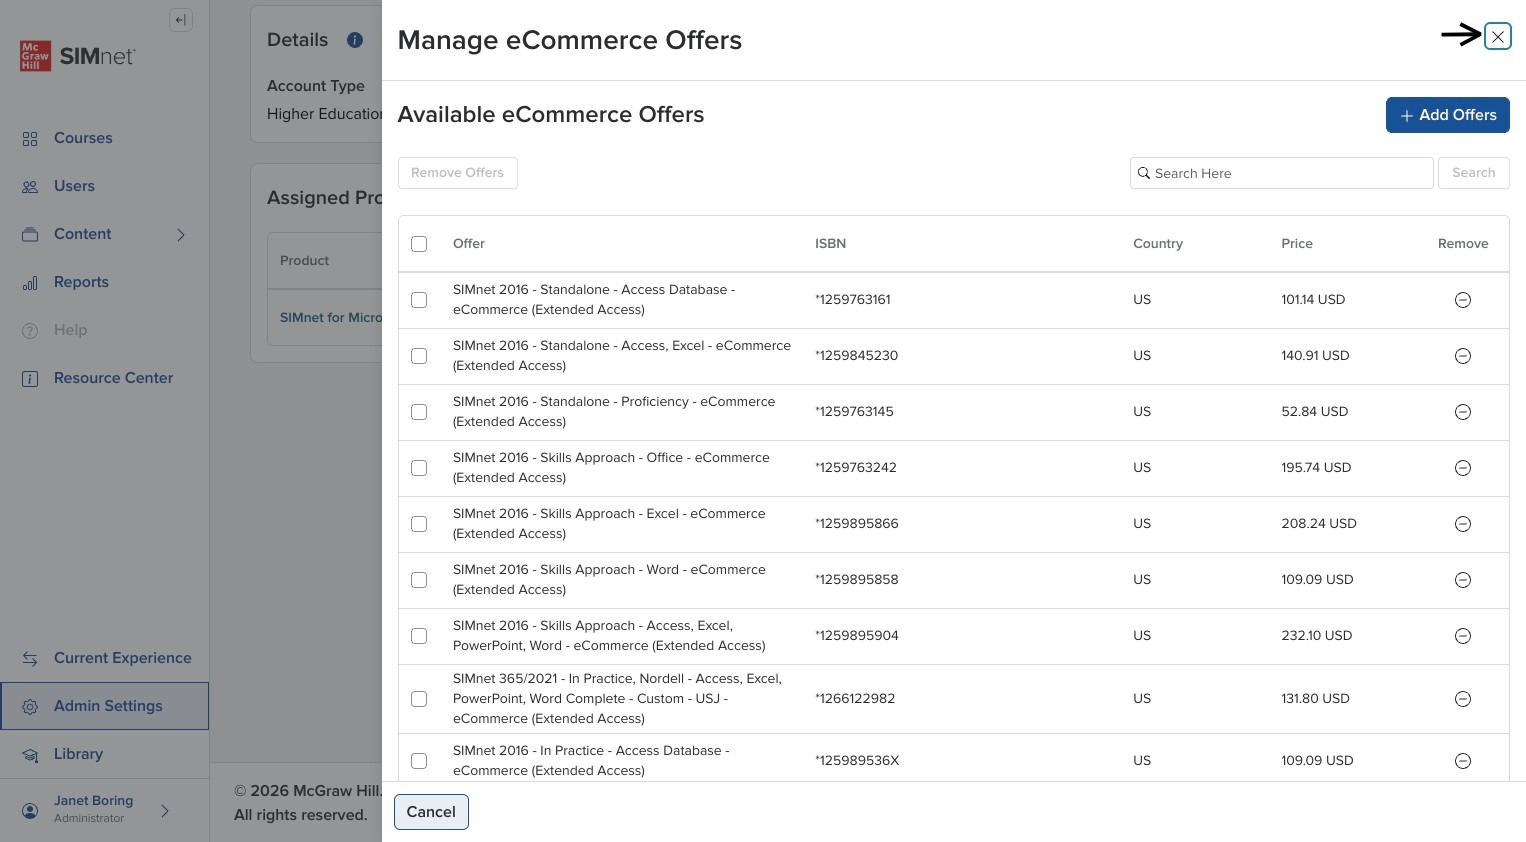
You can also view and manage offers for the account. Clicking eCommerce Offers opens a right-side panel to allow you to view and manage those offers.
{% hint style="info" %}
**Learn more:** [Manage eCommerce](/instructor-experience/admin-settings/admin-settings-general/manage-ecommerce.md)
{% endhint %}
Click the X to close the panel.
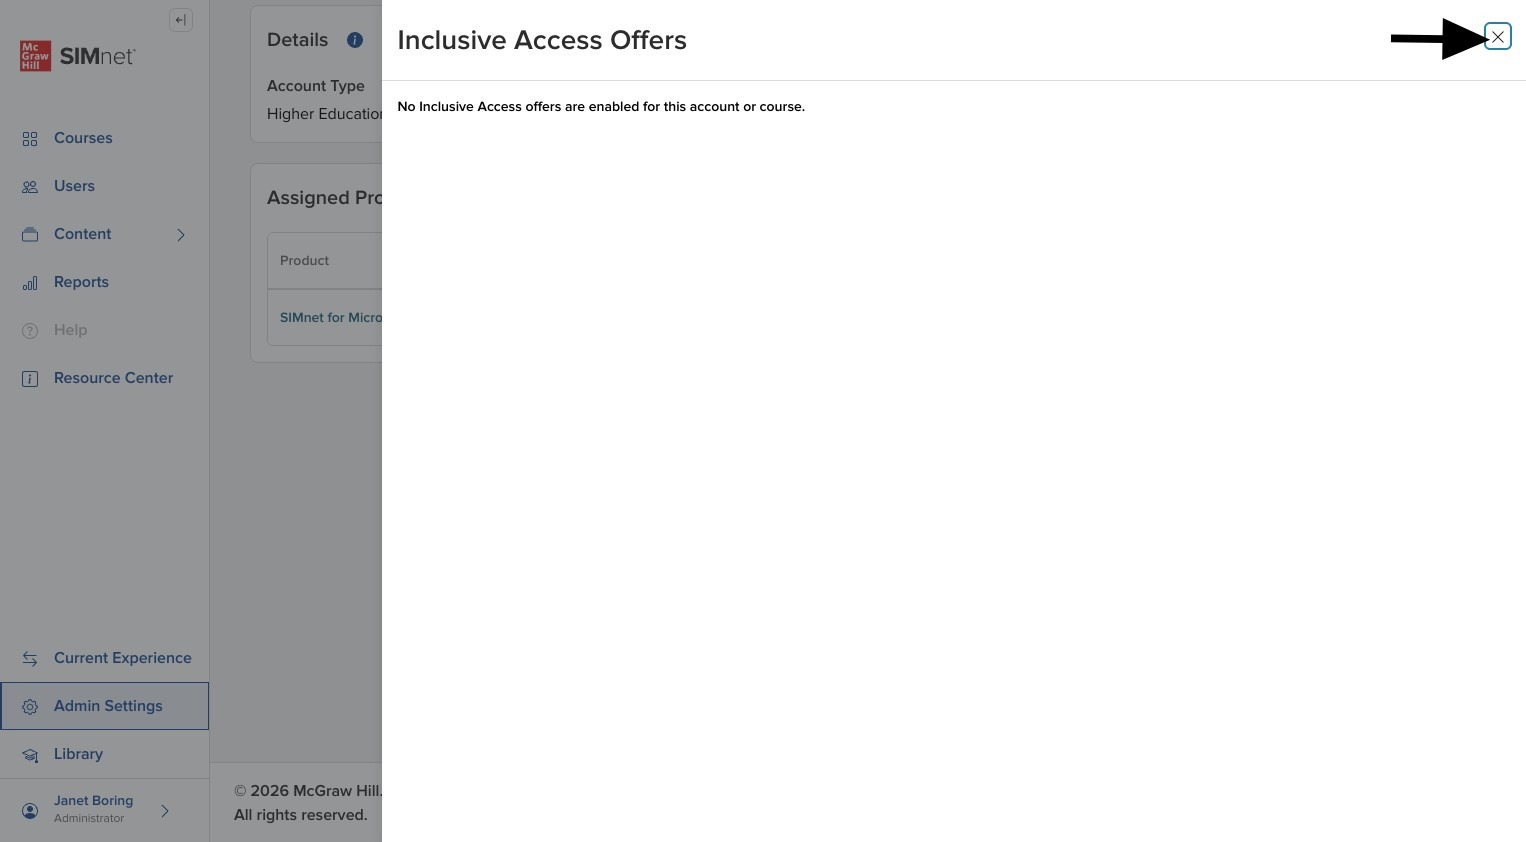
Clicking Inclusive Access Offers opens a right-side panel with view only information for your account.
If you have any questions about Inclusive Access, please contact your Sales or Customer Success Representative. Click the X to close the panel.
---
# Agent Instructions
This documentation is published with GitBook. GitBook is the documentation platform designed so that both humans and AI agents can read, navigate, and reason over technical content effectively. Learn more at gitbook.com.
## Querying This Documentation
If you need additional information that is not directly available in this page, you can query the documentation by asking a question.
Perform an HTTP GET request on the following URL with the `ask` and `goal` query parameters:
```
GET https://help.simnetonline.com/instructor-experience/admin-settings/admin-settings-general.md?ask=&goal=
```
`ask` is the immediate question: it should be specific, self-contained, and written in natural language.
`goal` is what the user is ultimately trying to achieve, the reason they need the answer. Sharing it helps GitBook give you a better, more relevant answer. A goal is most helpful when it describes the outcome the user wants rather than restating the question. For example, with `ask=how do I create an API token`, a goal like `automate deployments from our CI pipeline` lets GitBook tailor the answer to that use case.
The response will contain a direct answer to the question and relevant excerpts and sources from the documentation.
Use this mechanism when the answer is not explicitly present in the current page, you need clarification or additional context, or you want to retrieve related documentation sections.